Life is uncertain. Eat cake. And with a few tips from
professional cake decorators, you can turn your desserts into works
of art
When planning a Godfather-themed party, a cake in the shape of a severed horse’s head is the only kind that will do. And when someone needs a severed horse’s head cake, they call Debbie Hernandez, owner of Morgan Hill Bakery.
“Sometimes things get a little wacky,” said Hernandez of cake decorating. “But it’s fun, and I love to do it.”
Sculpting such elaborate figures out of cake and frosting is just one aspect of the art form that is cake decorating. With specialized tools, recipes and well-honed techniques, a baker’s imagination is the limit when it comes to cake design possibilities.
“One of the most unique things I’ve done lately is the (band) Greenday logo,” said Laurie Clarke, of www.sweetcelebrations.us, based in Morgan Hill. “It’s kind of a heart-shaped grenade. But I’ve done all kinds of stuff: castle cakes, carriages, princesses … they get very specialized. I made one in the shape of a record player for a ’50s theme party once.”
Watching cake decorators at work makes the process seem easy. On a birthday cake with big yellow and blue frosting balloons, Hernandez appears to begin zigzagging blue frosting along the top of the cake, Jackson Pollack-style. Look closer, though, and it’s apparent she’s actually writing on the cake, spelling out “Happy Birthday, Mom” in cursive. She writes using the big bag of frosting on a pristinely white cake with the ease most people have when writing with a pen on paper.
“The secret is practice,” Hernandez says. “Lots and lots of practice. You have to get used to writing like a kid again, with your hand around this big thing, like you used to do with big crayons.”
When it comes time to decorate her cake, Clarke picks up what looks like a giant-sized thumbtack. She holds the pointed part between her thumb and index finger, rolling it back and forth, as she seems to randomly pile short flecks of pink frosting onto the circular, smooth surface on top of the “tack.” A short strip of frosting here, a short fleck there, and when she holds out the final result for inspection, she doesn’t have an ugly pile of frosting bits. She has a perfectly shaped, delicate pink rose.
“Making roses is kind of like rubbing your tummy and patting your head,” Clarke said. “One hand is doing one thing and the other hand is doing something else.”
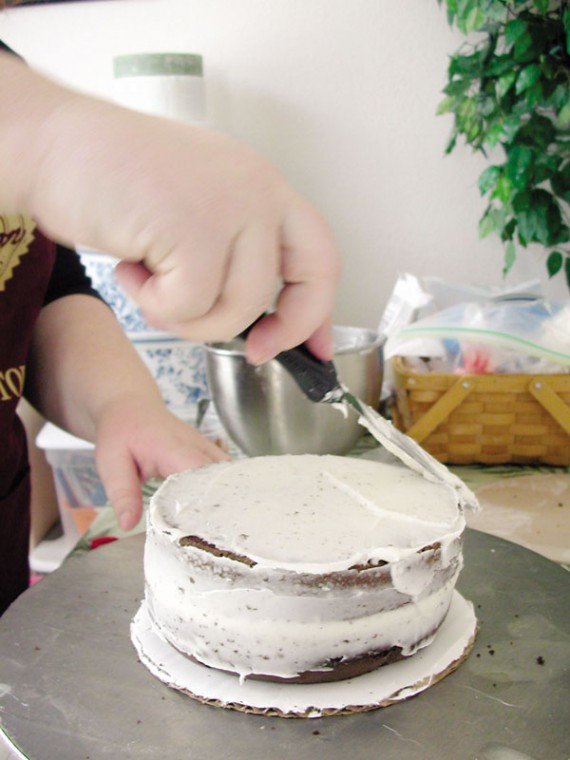
But decorating isn’t all about frou-frou frills and fun with frosting. A lot of it is hard work. Clarke saws the rounded top off her cake, creating a level surface. Then she uses another tool to saw her cake in half, making a place for a chocolate pudding filling. Hernandez kneads and rolls and tames a large ball of fondant icing until it’s flat and smooth and ready to go on the wedding cake that will sit in her display window.
“A lot of people have no idea how much goes into cake decorating, so they’re always surprised at the price on some of the bigger, more elaborate cakes,” Hernandez said. “But they take a lot of time and work if they’re going to look good.”
If you find the price of professionally done cakes is daunting, try decorating your own. Michael’s craft stores offer several cake decorating classes. Clarke teaches these classes at a Michael’s in San Jose.
“It’s a great hobby and it’s not like other hobbies,” Clarke said. “It’s a fun outlet, you create these things, but then it disappears. People eat them and they don’t stay and take up room and stare at you in the face.”
Before Hernandez owned her own bakery, she did cakes for friends and family. To hone her skills, she took cake-decorating classes at a Michael’s store.
“I would have never thought it would progress to this,” Hernandez said, laughing, as she placed a fondant-frosting bow at the top of her display cake.
Both Hernandez and Clarke recommend investing in a cake decorating kit, available at most craft stores, before trying your hand at the art. A basic kit can be as little as $15, Clarke said. Kits generally include frosting bags, a few specialized tips for the bags, and a small paintbrush for correcting mistakes. If you want to start with only the basics, at least invest in some frosting bags, which cost about $5.
A turntable is the other must-have tool for any cake decorator. Professional turntables aren’t necessary– a plastic Lazy Susan will do the trick.
The specialized tools and frosting mixes once only available to professionals, are now available to everyone in stores. People can buy airbrush food coloring in cans and books to explain techniques long after cake decorating classes are over.
“This is also a really friendly hobby,” Clarke said. “Most people are more than willing to share techniques and recipes. People don’t generally think of these things as secrets. I’ve written to decorators on TV asking how they did something, and I always get a response explaining it.”
And while they’re a friendly, helpful bunch, don’t ever mention the words “store-bought cake” to hard-core cake decorators. A dark look seems to come over their faces and they begin on a whole list of things that are wrong with store-bought cakes. They’re frozen, they aren’t made from scratch, they aren’t unique, you can only choose from a few designs, and they don’t taste as good …
“I know money is tight for a lot of people, so I understand why they go buy the huge cakes from Costco,” Hernandez said. “But I also think if you really want quality, you don’t go to the store. We’ll find a cake that works in your budget and is personalized and tastes good.”
Straight from the Pros
Though their most important tip is to take a class, the pros had these other cake decorating tips to offer:
– Look for promotions for cake decorating classes.
“You can almost always find the classes, which usually cost $25 for four sessions, at half-price,” said Laurie Clarke of Morgan Hill-based www.sweetcreations.us. “Sometimes you can find deals like buy a decorating kit, get the class for free, too.”
– Unless you have some experience, don’t wrap a whole cake in fondant frosting right away.
“Fondant is great for making decorations, but it can be tricky if you aren’t used to working with it,” said Debbie Hernandez, owner of Morgan Hill Bakery. “It’s hard to get just right and it’s hard to fix if there’s a mistake. Try using all fondant after you get more familiar with decorating.”
– Don’t grease pans with butter or the cake will get sticky.
“Use Crisco and then flour it,” Clarke said.
– Put the cake on a circular cardboard cut out. It makes moving the cake around easier and with less risk of breaking the cake.
– Don’t let a cake cool entirely in the pan you baked it in.
“When you can safely touch the side of the pan, tip the cake out,” Clarke said. “If it seems to stick, let it cool a little longer, then tip it out.”
– Use more frosting than you need.
“It’s easier and you won’t risk scraping against the cake and getting crumbs in your frosting,” Hernandez said. “And if you mess up, it’s easier to fix if you have plenty of frosting to work with. You can always scrape off the excess.”
– Don’t measure your homemade cake against the ones on television or in magazines.
“Those cakes are sanded down to perfection,” Clarke said. “No one’s cake looks like that in real life.”
– Fresh flowers are a simple and elegant way to decorate a cake, and they hide a multitude of sins.
“If there’s a bump or a ding in the frosting, that’s where you put a fresh flower,” Hernandez said, smiling. “No one will ever know.”
– When making roses, freeze the centers before starting. The stiff middle will prevent top-heavy roses from tipping over.
– Butter-based frostings will have a tendency to melt, so be careful with climate control.
– For easy borders along the base and around the top of a cake, pretend you are writing the cursive letter “e” or the capital “L” over and over again.
Photo Cakes
“A lot of people want a family photo on their cake, especially at graduation time. We do a lot of cakes with one picture of the graduate as a baby, and one picture of the graduate today. You print the picture off the computer through a regular printer on wafer-thin sugar paper with special food-coloring ink. Then you peel the picture of the backing, and put it right onto the cake. You just have to be careful. It’s very thin sugar and it will melt.”
– Debbie Hernandez,
owner of Morgan Hill Bakery
If you think you’ll be doing a lot of these kinds of cakes, it’s worth investing in a printer and the inks. If not, Hernandez said the bakery will print your photos for a small fee. Remember, the printer can only be used with food color ink. If it’s ever used with regular ink and paper, it can’t be used for food products again.
Pull-Apart Cakes
“Pull-aparts are getting really popular, especially at kids birthdays. You make them out of regular cupcakes that you arrange in any design you want, such as a flower. Then you frost the design like you would if it was one whole surface. When it comes time to serve the cake, the kids walk up and get a cupcake, pulling apart the cake.”
– Laurie Clarke of Morgan Hill-based www.sweetcelebrations.us
Present Cakes
“People really like the look of these cakes, and they’re pretty easy. Get your cake frosted as smooth as possible. Use a table scraper or something with a really flat surface to make sure everything is nice and even. Then you can get fondant-frosting mix, which has the consistency of Play-Doh, and roll it out into ribbon shapes. Then you criss-cross the fondant “ribbon” across the cake and bake a bow to go in the middle on top. It looks really neat.”
– Debbie Hernandez


